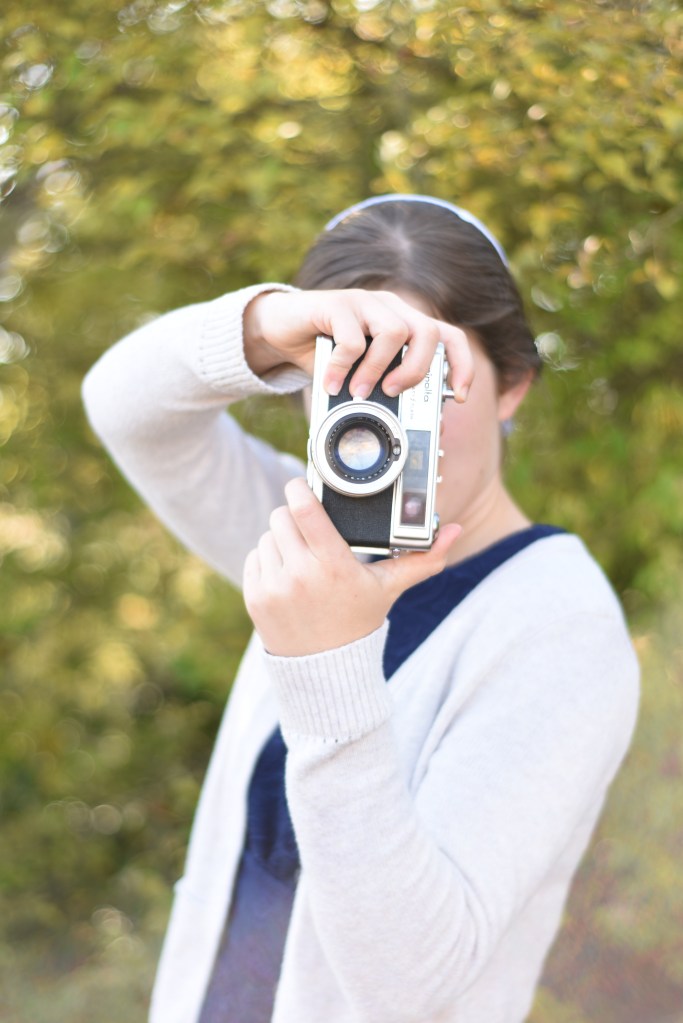
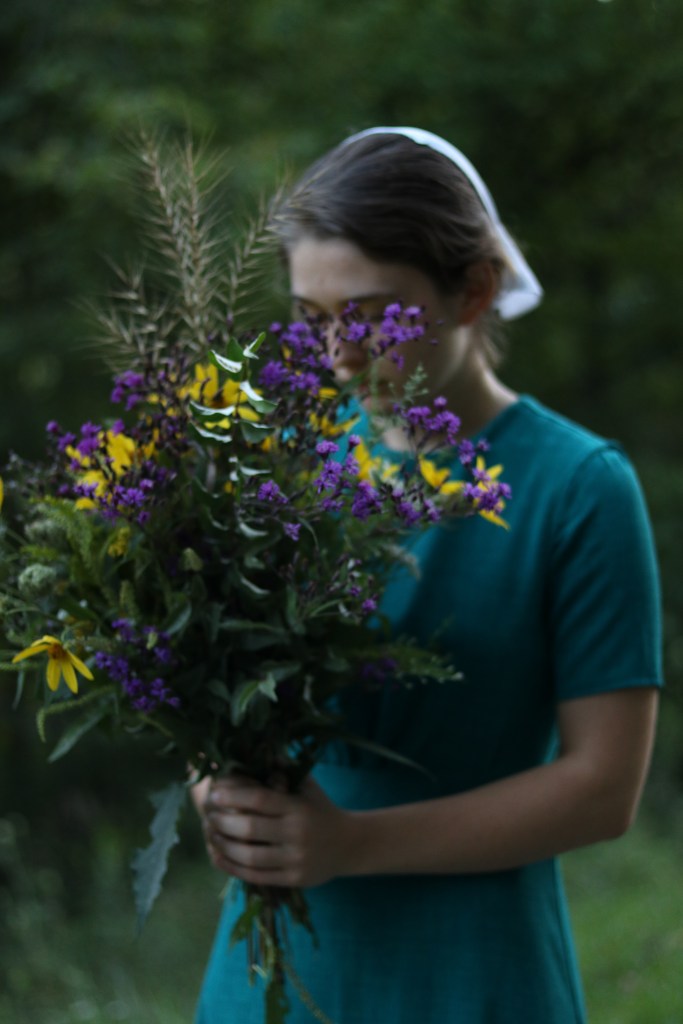
Photography is a love for all of us here at Pursuing Our Purpose! We thought that today we would share a few tips that have improved our portrait pictures for all you fellow photography friends.
tip 1
Do not use flash! It makes the lighting harsh and washes things out. So try not to use flash any more then necessary.
tip 2
Do not shoot up on a person. It is not the most flattering angle! Always try to be on the same level or shooting down on a person.
tip 3
Watch the lighting. Be careful when you plan a photo session or are trying to take a nice picture. Shadows and/or a washed out picture is probably not what you are going for! The early morning and then the evenings are the best times unless the day is cloudy.
tip 5
Don’t take a picture with the person face on. Once again it is not flattering to the person! Have your subject turn slightly to the side and you and your subject will be so much happier with the results!
tip 6
Practice Practice Practice! Find a photogenic model and have fun practicing different tips and tricks. Your pictures will improve!
tip 4
Pull your subject away from the background. It blurs it and that is what gives you a professional looking picture! We want the subject to be what the people first see, not a cluttered background.
”Taking an image, freezing a moment, reveals how rich reality truly is.”
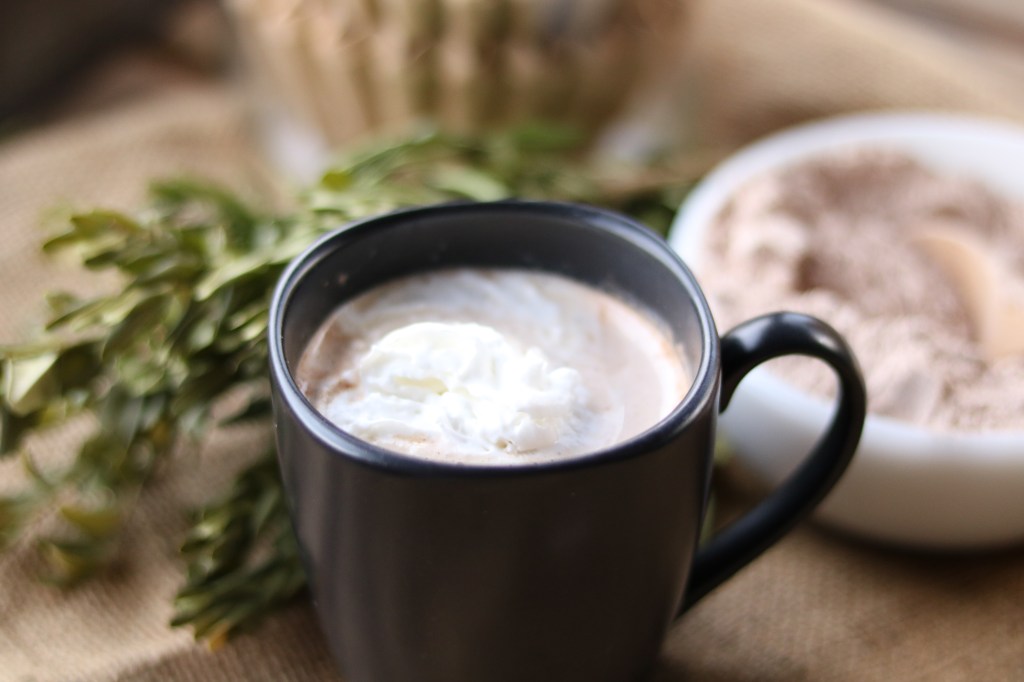
It’s fall, and today we sent several autumn DIY’s your way! My younger sister Kylie headed up these crafts. She is an adventurous and creative girl who likes to get out there and do stuff.
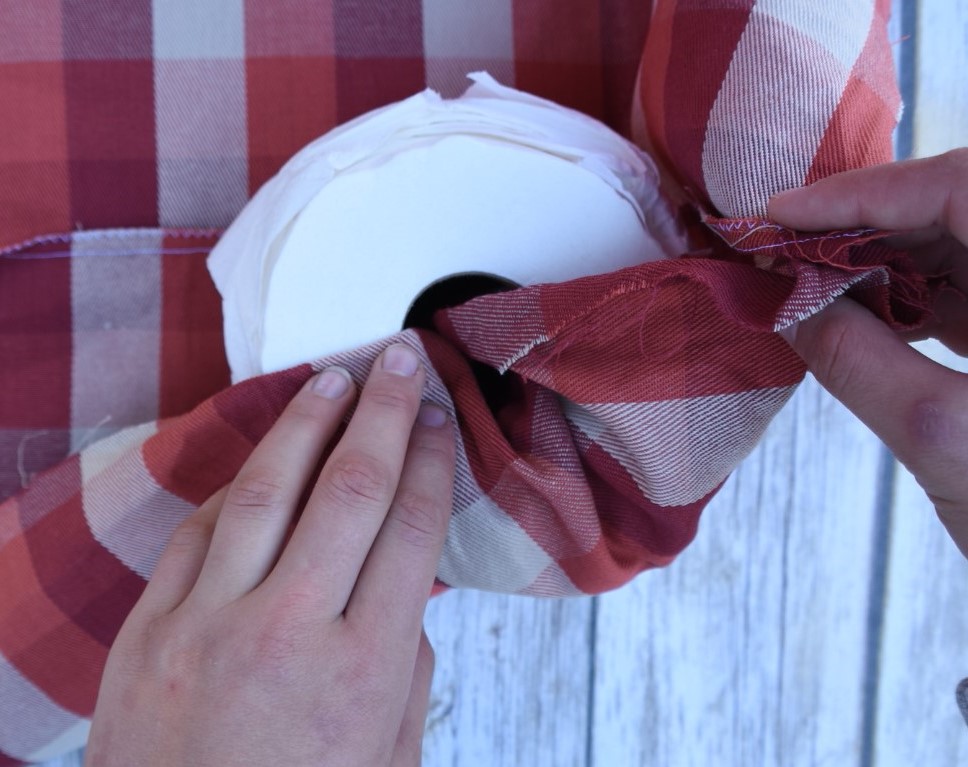
TP Pumpkin
Are you looking for some quick and easy fall decorations? If you are, then this pumpkin is the one for you because it can be made in no time flat and is super cute!
Supplies:
A piece of fall colored material measuring 18″ by 18″
A roll of toilet paper
A stick of some kind for the stem
A few fake ivy leaves or some other type of green leaves
Begin by laying the roll of toilet paper in the middle of your material and stuffing the edges of material down into the hole as shown on the picture. Once you have all the extra material down in the hole your result should be looking somewhat like a pumpkin.
All that’s left for you to do is to wedge your stick down in with all the material so it looks like a stem and glue some fake leaves around it. Presto, you’re done!
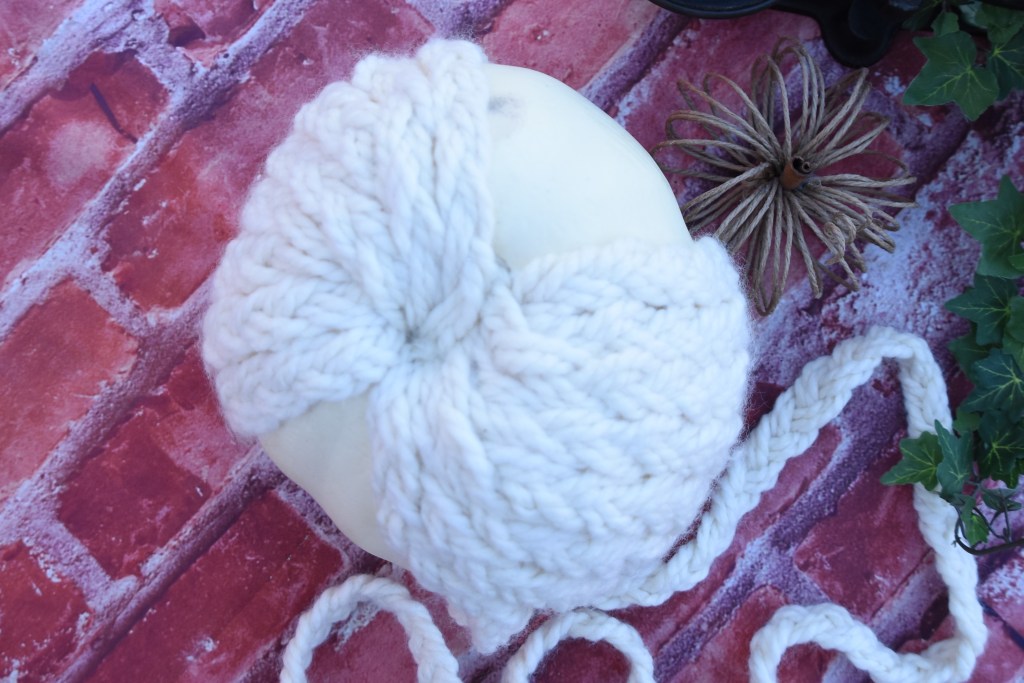
The Sweater Pumpkin
This is a very cozy pumpkin, but depending on what size you make it might not be exactly quick to make. You could grab a friend to help you with the braiding.
Supplies:
A styrofoam pumpkin; ours was about 8″ in diameter
Approximately 240′ of yarn, depending on the size of your pumpkin
Some type of short but wide stick for the stem
First of all pull the stem out of the styrofoam pumpkin; next use a knife to carve holes about two inches deep in the top and the bottom of the pumpkin. Depending on what color of pumpkin you use and what color of yarn you use you might want to paint the pumpkin to match the yarn so if there are some gaps between your braid it will blend in.
For our pumpkin we cut three strands of yarn with them being 80′ each, then doubled each strand in half to make a thicker braid. You will probably need to do a little estimating on how much yarn you will need if your pumpkin is a different size than ours. Now start braiding, yes, it will probably feel like you will be braiding forever! Also this is where a friend comes in handy as your three strands can become very tangled.
Once you are finished braiding start wrapping the braid around the pumpkin. Begin at the bottom and wrap to the top and down the other side; keep doing this until the pumpkin is totally covered. At the top and at the bottom you will need to use hot glue to glue the braid way down into the hole you carved so it doesn’t get all piled up.
When your pumpkin is completely covered, hot glue the stem on top and you’re done!
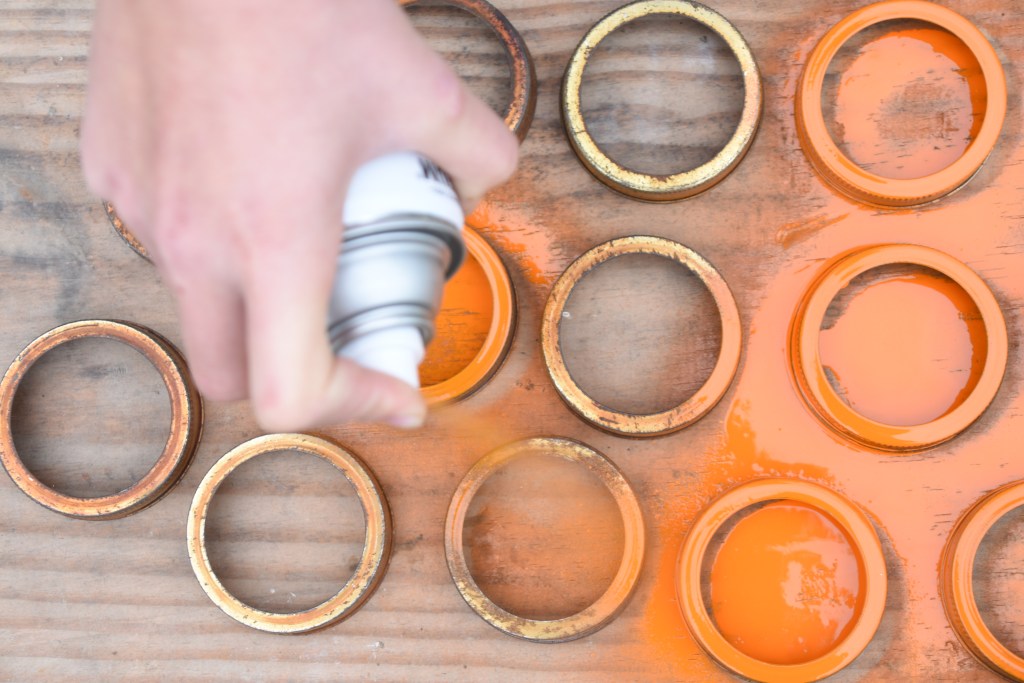
Jar Ring Pumpkin
This is a fun, rustic-looking pumpkin that can be made fairly easily. All you need is a few (old or new!) jar rings.
Supplies:
15 regular jar rings. If you want a larger pumpkin you can use wide mouth jar rings.
A cinnamon stick
A few fake green leaves
Pumpkin-orange spray paint
Spray paint the jar rings. After the first side dries flip them over and do it again so both sides get evenly coated. It’s up to you whether or not you want to do more than one coat.
Once the rings are completely dry thread them onto some string and tightly tie the string so all the rings are connected. Now arrange the rings a little until you have a good even pumpkin. Put a cinnamon stick in the hole and place a few leaves around it. Decorate!
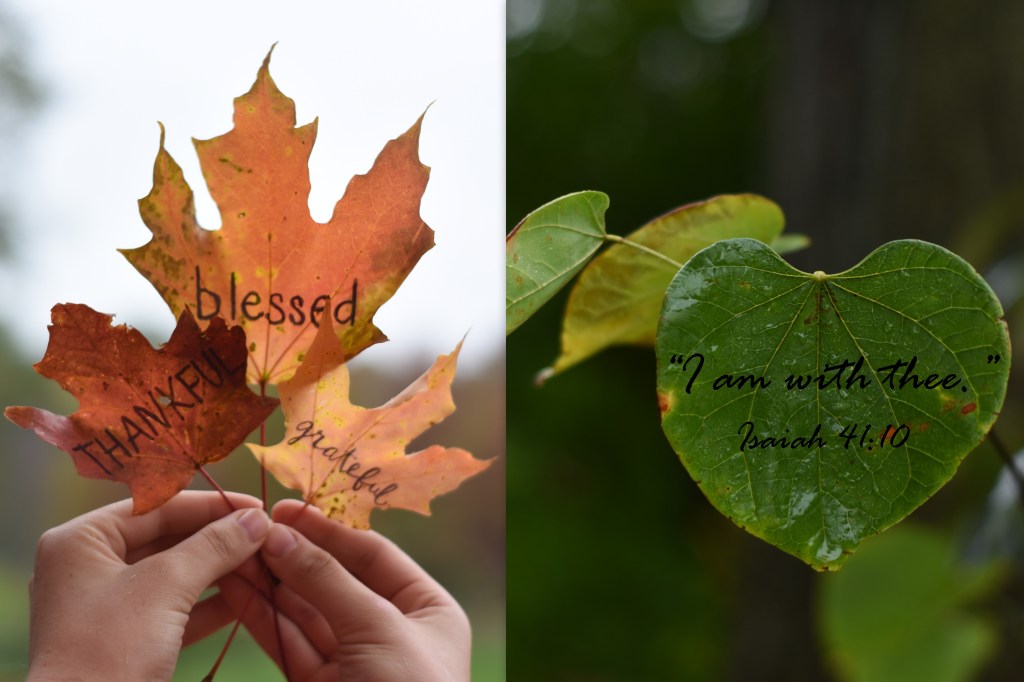
“While the earth remaineth, seedtime and harvest, and cold and heat, and summer and winter, and day and night, shall not cease.” Genesis 8:22
“And let us not be weary in well doing: for in due season we shall reap, if we faint not.” Galatians 6:9
“To everything there is a season, and a time to every purpose under the heaven: a time to plant, and a time to pluck up that which was planted;” Ecclesiastes 3:1-2
“Say not ye, There are yet four months, and then cometh harvest? Behold, I say unto you, Lift up your eyes, and look on the fields; for they are white already to harvest.” John 4:35
This time of year always reminds me of our responsibilities in the harvest of souls. Jesus has commanded us to go now, and bring in the harvest. There are many souls who do not know of God, what are you doing to change that?
“Optimism is the faith that leads to achievement. Nothing can be done without hope and confidence.” -Helen Keller